
Simple React app implementation for Wallet SDK
Add wallet code to your frontend
🔭 Guide overview
In this guide you'll add the wallet to a vanilla React app and serve it from your localhost. Then you will intialize and login with the wallet, and finally securely link the wallet to your client id from your server.
🧱 Implementation Steps
-
Client creation: Create your glip client using the Create new client guide ↗️ and use the x-api-key and clientID in the further steps
-
Create simple React app: Create a simple React app. Enter the following commands one by one in your terminal inside any folder.
# This will create a simple react app in your current folder # More on react-app : https://reactjs.org/docs/create-a-new-react-app.html npx create-react-app your-awesome-app-name # Enter into your project folder which is created above cd your-awesome-app-name -
Install the glip-wallet-sdk: Now install the dependency with the following
npm install glip-wallet-sdk
-
Add a change to index.html: Go to the folder
and add the following line to this file on a new line after it.public/index.htmlinside the project folder. Find the line<div id="root"></div> ... <div id="glip-wallet"></div> -
Add the code to initialize Glip Wallet: Create a new folder in
srccalledconstants. In this filder create a file calledgetGlipWallet.jsimport { glipWalletSDK } from 'glip-wallet-sdk/wallet'; let initializedGlipWallet = false; const getGlipWallet = async () => { if(initializedGlipWallet) { return initializedGlipWallet; } await glipWalletSDK.init({ chain:'polygon', authNetwork: 'cyan', // replace with your clientIdentifier clientIdentifier: '62de50119081671256277620' }); return glipWalletSDK; }; export default getGlipWallet; -
Add the required imports to App.js: Go to
src/App.jsinside your project folder. Add the following code from the first line of the file
// Imports the wallet sdk
import getGlipWallet from './constants/getGlipWallet';

// Imports the hook from react
import { useEffect } from 'react';
- Add the wallet login handler to your App.js: Go to
src/App.jsinside your project folder. Find the linefunction App()and add the following code on the next line (Inside the curly braces{}). Here we assume the client is already created (if not use testclientid62de50119081671256277620).
To create a client see Guide to Create Client ↗️. You will need to add the client ID to line #11.
/* This is a React hook that is called when the component is mounted.
It is initializing the wallet and checking if the user is connected.
If the user is not connected, it will show the connect modal.
If the user is connected, it will get the user info and log it to the console. */
useEffect(() => {

    (async () => {

      /* Initializing the wallet with the clientId, chain and network. */
      let glipWallet = await getGlipWallet();

      /* This is checking if the user is connected to the wallet. */
      let isConnected = await glipWallet.isConnected();

      /* This is checking if the user is connected to the wallet. If the user is not connected, it
      will show the connect modal. If the user is connected, it will get the user info and log it
      to the console. */
      console.log("isConnected : ", isConnected);
      if (!isConnected) {
        glipWallet.showConnectModal();
      } else {
        let userInfo = await glipWallet.getUserInfo();
        console.log("userInfo : ", userInfo);
        let walletId = await glipWallet.getWalletID();
        console.log("walletId : ", walletId);
      }

    })();
  }, [])
- Start the React app : Go back to the terminal in your project root (inside the
your-awesome-app-namefolder) and type the following command to run the application and serve the website. After the command go to localhost:3000 if it doesn't open automatically.
npm start
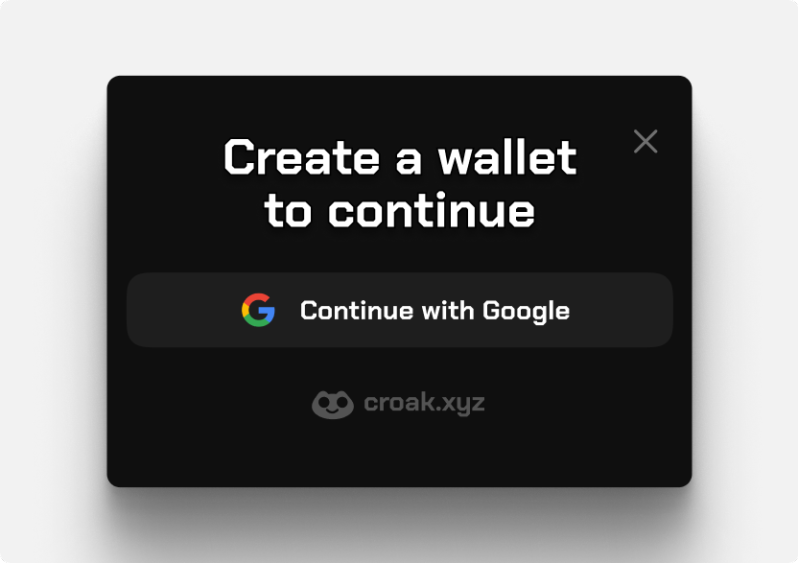
- Login with Google: On
localhost:3000you should see the following modal in the center of the screen. You can login using your google account.
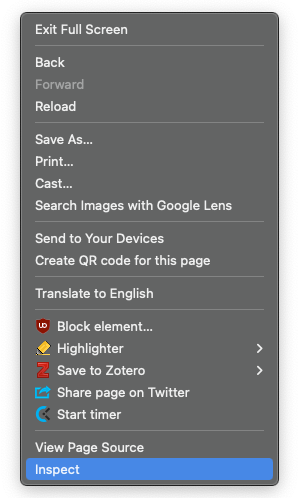
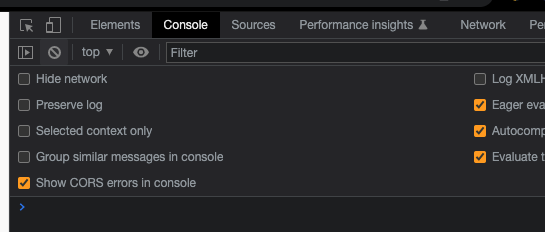
- Open console in the developer tools : Right click anywhere on the blank window and select
inspectfrom the options. Open theconsoletab in the window that has opened on the browser
- Check out the user's info and wallet Id: Note that we had added console logging for
userInfoandwalletId. You should be able to see the logs in the console if you completed the login step.


That's it! The wallet is ready for use.
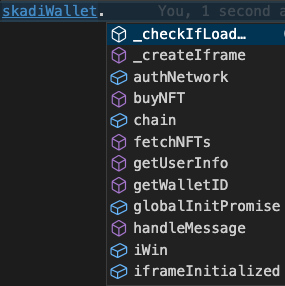
- Explore the wallet: Once this is done you can start using the
glipWalletfrom your App.js to build your app and get user and wallet information. You can also explore all the functions available in the Wallet API Reference ↗️ or from your IDE itself.
- Save the wallet Id: For users who log in on your frontend you can save their
walletIdin your system.
If you only want to use the Wallet SDK, you are done. Congrats!
If you're using the Asset (NFT/FT) APIs or the Marketplace APIs, then continue reading:
Link wallet to the Glip Backend SDK
Till now you have plugged in the wallet to your frontend, initialized it and logged the user in. The user is not yet linked to your client. You have to use walletId that you got on the frontend wallet sdk and link it with your client. For this, first you need to send the walletId to your backend, and then call the glip api from your backend (details in point 8).
We assume backend/serverless as it needs the X-API-KEY whic you are supposed to keep hidden from public.
- Link the wallet to the Glip Backend SDK
- Use the walletId that you got from the wallet SDK (from Step 7). Assuming
fdhvfjhewfbejwhdfgebj, make the following request. Get the x-api-key from Step 1
curl --request POST \
     --url https://be.namasteapis.com/blockchain/v1/auth/verify-token \
     --header 'Accept: application/json' \
     --header 'Content-Type: application/json' \
     --header 'x-api-key: TheAPIKeyForClient' \
     --data '
{
     "walletId": "fdhvfjhewfbejwhdfgebj"
}
'
- That's it you're done 🏁 The user's wallet is created and and linked to the backend SDK, enabling the user to participate in the client's marketplaces and asset activities.
📌 Further queries
For any queries or guidance, join Glip Discord or write to [email protected]